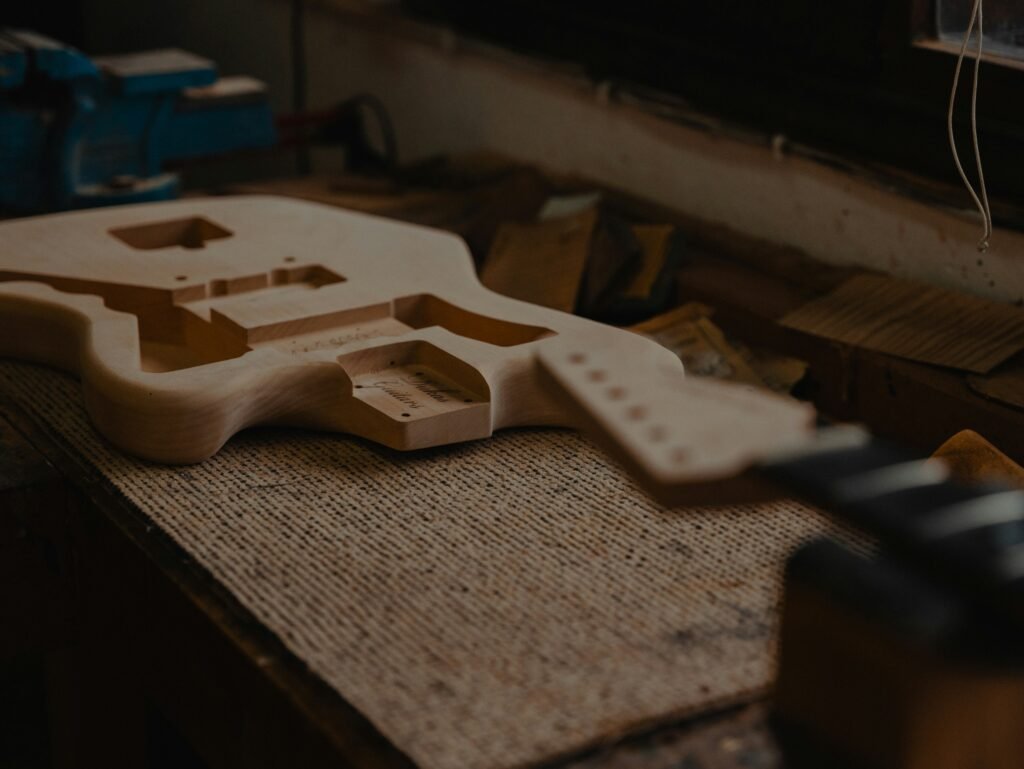
Last autumn I stubbed my foot on a gig bag that sprawled across the living room floor. My guitar toppled and kissed the baseboard. Nothing cracked yet the scene bothered me. I wanted a safe home for every instrument that still looked good beside a sofa. So I sketched a diy guitar stand on scrap cardboard. A few rough cuts later the first frame clicked and my Stratocaster sat proud like art in a gallery. The feeling pushed me to write this long walk through for you.
Why Make Your Own Stand
Building a stand feels good for many reasons.
- You keep each guitar close so you play more.
- You protect the finish with gentle pads.
- You save cash because wood in the scrap pile works fine.
- You shape a piece that matches your decor rather than settling for black metal tubing.
- You practice core woodworking skills on a friendly project.
The whole process smells of fresh pine and buzzing sanders. Sawdust drifts like snow and the shop hum settles nerves. The final piece carries every touch of your hand.
Pick A Style That Fits Your Space
Three designs cover most needs.
- Single board slot stand
- Two interlocking pieces form a sculptural cradle.
- Suits one acoustic or one electric guitar.
- Fast build that looks sleek beside a reading chair.
- Folding A frame
- Flat storage helps small rooms.
- Brass hinge at the top and a leather cord define the spread.
- Perfect for jam sessions away from home.
- Multi guitar rack
- Holds four to twelve instruments in neat rows.
- Works in studios where order matters.
- Adjustable neck yokes adapt to odd shapes.
Scan the list and feel which shape sparks joy. Then read the matching plan in depth.
Gather Tools And Supplies
A diy wooden stand for guitar does not demand fancy gear. Basic hand tools guide every cut.
- Measuring tape
- Sharp pencil
- Carpenter square
- Jigsaw or small band saw
- Drill with twist bits and a wide Forstner bit
- Router plus quarter inch round over bit
- Random orbit sander with paper from eighty grit to two hundred twenty grit
- Clamps of any style
- Sharp chisels for fine spots
- Eye and ear protection
Nice extras push the finish higher.
- Flush trim router bit and pattern template
- Spindle sander for smooth curves
- Digital angle gauge for quick repeat cuts
Wood Choices
Hardwood lifts the final look.
- White oak feels calm and strong.
- Walnut offers rich chocolate tone.
- Maple stays bright under clear coat.
- Pine works on a tight budget and still takes paint or stain.
Padding And Hardware
Gentle padding is vital. Felt or leather keeps nitrocellulose safe. Skip unknown rubber. Brass hinges resist rust and add class. Dowels link joints with hidden strength.
Plan One Single Board Slot Stand
Picture two letter L shapes that slide together. That is it. The guitar rests on the lower arm while the back leans on the upper arm.
Cut List
- One board eleven and a quarter inches wide and twenty four inches long.
- Two felt strips ten inches long and one inch wide.
Layout Tips
Draw the outline on light cardboard. Mark points with a pushpin. Transfer dots to wood and connect with a straightedge. The curve between points can come from a thin strip of wood bent by hand. This trick avoids wavy freehand lines.
Build Steps
- Square both board ends on the saw.
- Sketch the two L shapes so grain runs along the long legs.
- Drill the ends of the slot with the Forstner bit so the inner corners stay round.
- Cut the slot walls with the jigsaw. Keep the blade just outside the line.
- Shape the outer profile and leave a small margin for sanding.
- Smooth every curve with the sander or a rasp.
- Run the router along outer edges with the larger round over bit.
- Switch to the small round over bit for all touch points.
- Sand the faces up to two hundred twenty grit.
- Dry fit the two parts. They should slide without force yet hold tight.
- Wipe away dust.
- Apply your choice of finish.
- Glue felt to the cradle points.
Finishing Ideas
Water based polyurethane keeps maple pale. Wipe on oil varnish blend warms walnut. Hardwax oil leaves a soft sheen and feels silky. Keep coats thin to avoid ridges under pads.
Plan Two Folding A Frame Stand
Picture a gentle A shape that folds flat when you pull a cord. The build suits travel and small living rooms.
Cut List
- One board twelve inches wide and thirty inches long.
- Brass hinge two inches wide.
- Leather lace sixteen inches long.
- Four pads for feet.
Build Steps
- Crosscut the board into two matching blanks twenty eight inches long.
- Sketch a soft sweep on one blank and copy that line to the other blank.
- Cut and sand both shapes until they match.
- Round all outer edges with the router.
- Place the blanks face to face then screw the hinge at the very top.
- Drill a quarter inch hole through both legs eight inches from the base.
- Thread the lace through both holes and tie a knot on each end.
- Stand the frame on a flat floor and drop a guitar inside.
- Adjust the knot so the body rests on the cradle without tipping.
- Stick felt on every wood spot that meets the guitar.
- Add rubber foot pads under each corner.
- Finish the wood with your chosen topcoat.
Fold the stand and slip it into a backpack pocket. You can now set up a safe spot anywhere you play.
Plan Three Multi Guitar Rack
This rack turns chaos into clean lines. Six guitars line up like soldiers yet each leaves the floor clear.
Dimension Goals
- Width fifty inches for six electrics.
- Depth sixteen inches to handle bass bodies.
- Height forty inches so tall headstocks clear the top bar.
Wood And Hardware
Pick strong one by three hardwood for rails and sides. Use two lower rails or round dowels as the cradle. Felt wraps these rails. Choose an aluminum top bar if you want sliding yokes.
Cut List For Six Guitars
- Two sides forty eight inches tall shaped like a calm Y.
- Two lower rails forty six inches long.
- One top bar forty six inches long.
- Six neck yokes three inches wide and four inches tall.
Joinery Advice
Half laps tie the Y shape and look clean. Pocket screws also work and save time. Brass inserts with machine bolts allow knockdown moves.
Build Steps
- Mill every board flat and square.
- Outline the side profile and cut it slow for clean edges.
- Mark half lap joints at the branch and clear waste with a chisel.
- Dry fit until the side sits flat on the bench.
- Bore holes for dowel cradle rails with the Forstner bit so edges stay crisp.
- Glue the side joints and let them set under clamps.
- Fit the lower cradle rails and wrap them with felt once finish dries.
- Attach the top bar with screws from the inside face.
- Shape neck yokes on the band saw.
- Sand every curve smooth.
- Line each yoke with felt.
- Screw yokes to the top bar with a two inch gap for electrics.
- Add a back stretcher near the floor if you feel flex when you press.
- Finish the rack and let it cure for a full week before loading guitars.
Slide each guitar in and enjoy the tidy view. The bodies shine in a neat row and the room breathes easier.
Finish That Protects And Shines
- Raise grain with a damp rag and let it dry.
- Sand again with three hundred twenty grit for a silk feel.
- Brush or wipe thin coats rather than one heavy flood.
- Let each coat dry long enough so dust will not stick.
- Buff with brown paper for a soft gloss without extra polish.
Good finish feels smooth when you glide a finger. It also smells faintly of linseed when warm light hits the surface.
Common Mistakes And Fast Fixes
- Sharp inner corners cut guitar finish. Round more until edges feel like river stones.
- Tight slots squeak. Sand walls with paper wrapped on a paint stick.
- Legs spread too far on the A frame. Shorten the leather cord one inch.
- Rack wobbles. Add a rear stretcher low and tight.
- Pads creep. Use fresh contact cement and press with a block.
Frequently Asked Questions
Is it safe to leave a guitar on a stand
Yes if the stand supports the body and keeps the neck free from strain. Soft pads stop scratches.
How can I hang a guitar on a wall
Screw a wood or metal hanger into a wall stud then line the hook with felt. Keep the headstock clear of drywall.
What angle holds most guitars steady
Nine degrees suits acoustics while six to nine degrees handles electrics. Test with your instrument and adjust the slot or lace.
How wide should neck yokes sit in a rack
Start with four and a quarter inches between centers for thin bodies. Spread to five inches for jumbo acoustics.
Can felt stain nitrocellulose finish
Natural wool felt stays safe. Leather also works if you choose vegetable tan stock. Replace pads if they feel sticky in humid months.
Quick Design Rules For Small Rooms
- Use vertical racks to save floor depth.
- Pick maple with clear coat to brighten dark corners.
- Choose walnut for warmth against navy walls.
- Match white oak to modern light floors.
Light bounce, grain shimmer, and soft guitar curves turn the stand into useful art.
Time And Cost Guide
- Slot stand builds in one evening and costs about thirty dollars.
- Folding stand needs two short sessions and costs forty five dollars with brass parts.
- Rack takes a full weekend and costs around one hundred dollars in hardwood.
Prices shift with local lumber rates yet scrap cuts often cover half the board feet.
Sensible Safety Checks
Wear goggles because thin blades fling chips. Keep corded tools clear of wet floors. Brush loose dust before you start finish work. Store solvent rags in a metal can with a lid. Small habits save big headaches.
From Sawdust To Song
Picture the first chord you strum once the fresh stand raises your guitar. The wood scent lingers on your fingertips. The room looks tidy and calm. Friends ask where you bought the stand and you grin. You built it.
So grab that board and turn up the shop radio. Mark lines on bright maple. Let the blade sing. Sand until curves feel soft as beach stones. Wipe on finish and watch grain glow. Then set your guitar in its new throne.
Play a riff. Smile. Repeat. The stand will wait for every note you chase next.