I once stained a walnut table in my small garage shop. I brushed a deep chestnut tone across the grain. The first coat sank in like water on desert sand. I wanted drama in the color so I rushed a heavy second coat. The air smelled like solvent that night. The next morning the tabletop felt sticky and dull. I spent the day rubbing back the mess and swore to respect the absorption rule forever after. I share that story because every reader who searches how many coats of stain on wood hopes to avoid the same sticky setback.
Quick Answer for Busy Builders
One coat often delivers full color on interior furniture when you work with a penetrating stain. Add a second coat only if the first sinks in fully and you crave deeper tone. Solid color exterior formulas call for two thin coats for lasting coverage. Very dense hardwoods accept one coat and no more. Always wipe surplus liquid because stain lives inside the grain rather than on the surface.
Why Coat Count Matters
Stain blends pigment with carrier liquid. Oil based products move color with oil. Water based versions move color with water. Gel stain sits thicker and rides near the surface. Paint forms a film yet stain soaks the fibers. Your decision on coat count shapes color depth and future durability. Clear finish adds protection later so think through the whole finish stack before popping the lid on the can.
The Absorption Rule
Apply only the amount the wood drinks within the recoat window. Extra liquid pools on top and dries slow which causes tacky film. Check absorption with two quick tests.
- Drop test. Place a small drop on scrap from your project. If it sinks within sixty seconds the pores stay open. If it shines on top the pores sit full.
- Mineral spirits test. Wipe a small dab of mineral spirits on the surface. Fast wetting shows room for more stain. Beading signals saturation.
Coat Count by Stain Type
Oil Based Wiping Stain
- One full coat often fills the color on oak pine or walnut.
- A second coat works only when the first fails to seal the grain. Apply wet on wet within fifteen minutes then wipe clean.
- Maple cherry and other tight grain species show little change after a second pass so save your effort.
Water Based Stain
- Start with one light coat for baseline tone.
- Wait two hours then test. If the surface looks dull and dry you may add a second thin coat for richer hue.
- Keep each application thin because thick layers raise fibers and create patchy appearance.
Gel Stain
- One even coat delivers bold color while hiding blotch risk on pine or birch.
- After a seal coat you may float a second glaze coat to tweak warmth or shade. Think of glaze as makeup rather than structure.
Exterior Deck or Fence Stain Note
Clear sealers toners and semi transparent outdoor products perform best with one coat. Solid color variants need two thin coats for full hide and weather strength. Even on exterior work follow the absorption rule and wipe puddles.
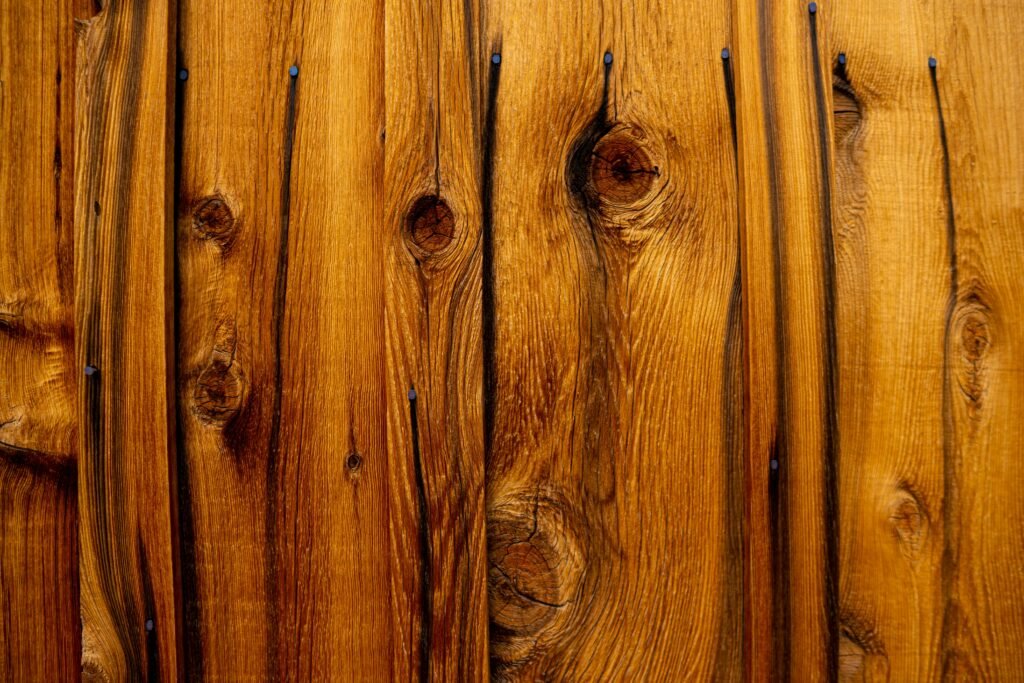
Wood Species Guide
Understanding species helps answer how many coats of stain on wood without guesswork.
Softwood Group
- Pine spruce and fir absorb fast. One or two coats work after a pre stain conditioner that tames blotches.
- Cedar gains rich tone in one coat and rarely benefits from more.
Open Pore Hardwood Group
- Oak ash and mahogany feature large pores. One coat often looks handsome. A second coat can add body when desired. Brush across the grain first then finish with grain direction for clear stripes.
Tight Grain Hardwood Group
- Maple birch and cherry resist color. One coat sets the limit in most cases. Use water dye before stain if you need dramatic shade then seal and glaze.
Timing Between Coats
Dry time varies with temperature humidity and airflow.
- Oil based stain. Wipe excess after ten minutes. Wait four hours. Touch the surface. If it feels dry and smooth you may proceed.
- Water based stain. Wipe excess after five minutes. Wait two hours. Speed the process with a fan that moves air gently across the piece.
- Gel stain. Respect manufacturer timing which often lists eight hour intervals between glaze passes.
Two simple checks confirm readiness. Drag a finger across the wood. A squeak signals dryness. Bring your nose close. A faint solvent scent is normal but a strong blast warns of lingering liquid.
Sanding Between Stain Coats
Skip sanding between stain coats in most cases. Abrasive paper pulls pigment from pores and creates uneven patches. Sand only when you feel raised grain or see dust nibs. Use 320 grit pressure light as a feather. Wipe dust and reassess absorption before adding more stain.
Over Application Hazards
Extra coats that no longer sink cause several headaches.
- Sticky surface that stays soft for days
- Weak bond with future clear coats
- Peeling film when wood moves with seasons
If you overshoot flood the surface with mineral spirits scrub with a white pad and wipe dry. Let the piece rest overnight then scuff lightly and carry on with clear finish.
Stain Over Stain
Within the recoat window stain bonds fine over prior stain. After full cure the pores sit closed and fresh stain fails to penetrate. At that stage seal with thin dewaxed shellac then apply a glaze coat or toner within the clear finish for color shifts.
Troubleshooting Corner
- Sticky feel after twenty four hours. Scrub with mineral spirits then wipe dry. Wait overnight.
- Blotchy softwood. Strip fresh stain with spirits or sand cured stain. Apply conditioner then restain.
- Color too dark. While still wet wipe with spirits to pull pigment. After cure scuff then tone with tinted clear rather than more stain.
- Color too light. Add a second coat if pores remain open. Else glaze or tone.
Project Examples
Oak Dining Table
- One coat of oil based wiping stain.
- Add second coat only if the first sinks fast.
- Protect with four coats of wipe on polyurethane.
Maple Dresser
- Apply water dye for deep base.
- Seal with shellac cut thin.
- Brush one coat gel stain for fine tone control.
Pine Floating Shelves
- Conditioner first.
- One coat oil based wiping stain with fast wipe.
- Second coat optional based on absorption.
Walnut Coffee Table
- One coat oil based stain to level color.
- Move straight to clear finish unless you crave extra depth.
Cherry Bathroom Vanity
- Single coat stain or clear finish if you like natural warmth.
- Cherry darkens over time so avoid heavy second coats.
Prep Steps That Matter
Follow this flow before the first brush stroke.
- Sand to 180 grit on hardwood and 150 grit on softwood.
- Vacuum then wipe with clean dry rag.
- Break sharp edges so stain does not cling there.
- Apply conditioner on softwood and wait as the label states.
- Stir stain from bottom until pigment disperses.
- Test on scrap and adjust plan before touching the project.
Application Tools and Technique
Choose a simple tool for fast clean work.
- Lint free rag for large flat panels.
- Natural bristle brush for corners and spindles.
- Foam brush for touch ups.
Work in small zones. Flood the surface. Wait a short moment. Wipe across the grain then with the grain. Keep a bright side light to spot missed areas or shiny puddles.
Wet on wet method gives deeper color. Apply coat one. While it stays wet brush coat two. Merge the liquid then wipe. Both coats enter the pores together which avoids surface buildup.
Environment Factors
Temperature and humidity change everything.
- Aim for sixty to seventy five degrees Fahrenheit.
- Maintain moderate humidity.
- Position a small fan across the room for gentle airflow.
- Shade the work from direct sun to prevent skinning.
- Seal end grain early because it absorbs faster than face grain.
Coverage and Cost Planning
Smart builders measure coverage to save money.
- First coat covers one hundred fifty to three hundred square feet per quart depending on pore size.
- Second coat goes farther at two hundred to four hundred square feet per quart.
- Sample boards cost pennies and save gallons.
Multiple unnecessary coats can raise material cost by half and double labor time. The absorption rule keeps budgets lean.
Advanced Color Control
When you crave showroom depth add color in distinct layers without forcing extra absorption.
- Apply water dye for undertone on tight grain species.
- Seal with thin dewaxed shellac.
- Float gel stain glaze to warm or cool while keeping grain sharp.
- Finish with clear coat of choice.
This stack provides rich tone and stable bond without heavy stain buildup.
Clear Finish Timing
Stain needs full dry time before sealer.
- Oil based stain. Wait twelve hours at minimum.
- Water based stain. Wait four hours.
- First clear coat often lifts tiny fibers so sand lightly with 320 grit then add two more coats for tabletops or shelves.
Decision Flow
Follow this checklist and answer how many coats of stain on wood with confidence.
- Identify stain type.
- Identify species.
- Create sample on scrap with one coat.
- Evaluate absorption.
- Add second coat within window only if pores stay open.
- If pores close switch to glaze or toner.
People Also Ask
- How many coats of stain on wood for a dining table?
One coat usually does the job. Add a second only when the first vanishes into the grain and deeper tone is desired.
- How soon can you put a second coat of stain on wood?
Four hours for oil based and two hours for water based in average shop conditions.
- Is it necessary to sand between layers of stain?
Sanding rarely helps because it removes color rather than refine it.
- Is it okay to stain over stain?
Yes inside the recoat window. After cure use glaze rather than fresh stain.
- Can you apply too many coats of stain?
Yes. Extra liquid that fails to penetrate leaves a weak sticky film.
A Short Shop Tale
A friend once tried three coats on maple cabinet doors because he wanted espresso shade. The third coat floated like syrup. We stripped the doors under a porch light. We then mixed a dark water dye and hit one coat. Problem solved. The cabinet still hangs in his kitchen and the color looks deep and lively.
Final Thoughts
Start with one coat. Watch how the wood responds. Respect the clock. Wipe every coat clean. Build color with glaze when the pores close. Protect with solid clear finish. Your furniture will thank you every time sunlight hits its surface.
Share photos of your next project. I enjoy seeing fresh grain shine under a smart finish.